PDF Publication Title:
Text from PDF Page: 004
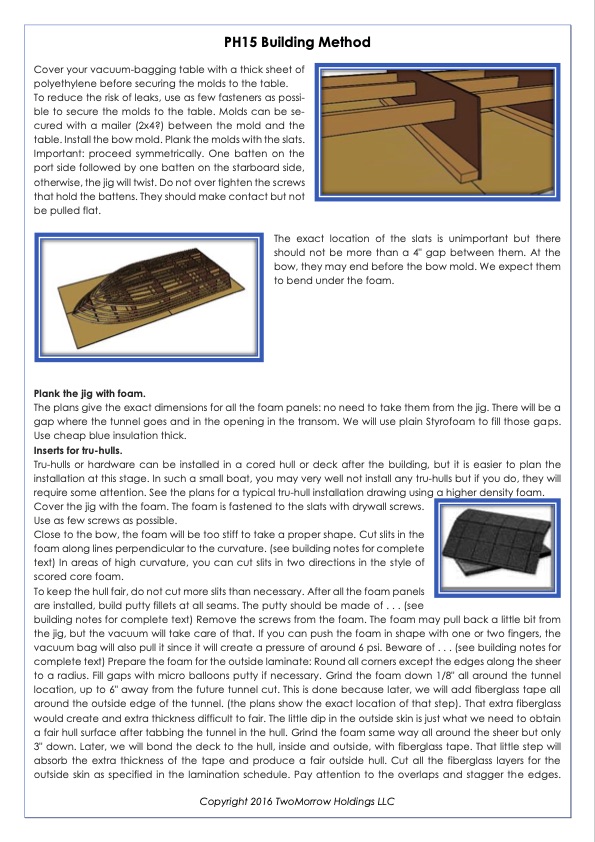
PH15 Building Method Cover your vacuum-bagging table with a thick sheet of polyethylene before securing the molds to the table. To reduce the risk of leaks, use as few fasteners as possi- ble to secure the molds to the table. Molds can be se- cured with a mailer (2x4?) between the mold and the table. Install the bow mold. Plank the molds with the slats. Important: proceed symmetrically. One batten on the port side followed by one batten on the starboard side, otherwise, the jig will twist. Do not over tighten the screws that hold the battens. They should make contact but not be pulled flat. The exact location of the slats is unimportant but there should not be more than a 4" gap between them. At the bow, they may end before the bow mold. We expect them to bend under the foam. Plank the jig with foam. The plans give the exact dimensions for all the foam panels: no need to take them from the jig. There will be a gap where the tunnel goes and in the opening in the transom. We will use plain Styrofoam to fill those gaps. Use cheap blue insulation thick. Inserts for tru-hulls. Tru-hulls or hardware can be installed in a cored hull or deck after the building, but it is easier to plan the installation at this stage. In such a small boat, you may very well not install any tru-hulls but if you do, they will require some attention. See the plans for a typical tru-hull installation drawing using a higher density foam. Cover the jig with the foam. The foam is fastened to the slats with drywall screws. Use as few screws as possible. Close to the bow, the foam will be too stiff to take a proper shape. Cut slits in the foam along lines perpendicular to the curvature. (see building notes for complete text) In areas of high curvature, you can cut slits in two directions in the style of scored core foam. To keep the hull fair, do not cut more slits than necessary. After all the foam panels are installed, build putty fillets at all seams. The putty should be made of . . . (see building notes for complete text) Remove the screws from the foam. The foam may pull back a little bit from the jig, but the vacuum will take care of that. If you can push the foam in shape with one or two fingers, the vacuum bag will also pull it since it will create a pressure of around 6 psi. Beware of . . . (see building notes for complete text) Prepare the foam for the outside laminate: Round all corners except the edges along the sheer to a radius. Fill gaps with micro balloons putty if necessary. Grind the foam down 1/8" all around the tunnel location, up to 6" away from the future tunnel cut. This is done because later, we will add fiberglass tape all around the outside edge of the tunnel. (the plans show the exact location of that step). That extra fiberglass would create and extra thickness difficult to fair. The little dip in the outside skin is just what we need to obtain a fair hull surface after tabbing the tunnel in the hull. Grind the foam same way all around the sheer but only 3" down. Later, we will bond the deck to the hull, inside and outside, with fiberglass tape. That little step will absorb the extra thickness of the tape and produce a fair outside hull. Cut all the fiberglass layers for the outside skin as specified in the lamination schedule. Pay attention to the overlaps and stagger the edges. Copyright 2016 TwoMorrow Holdings LLCPDF Image | PH15 Building Method Vacuum Bagging
PDF Search Title:
PH15 Building Method Vacuum BaggingOriginal File Name Searched:
ph15-building-method.pdfDIY PDF Search: Google It | Yahoo | Bing
5,000 BF Shipping Container Lumber Dry Kiln For Quality Lumber The 5,000 BF container kiln consists of one 40 foot high-cube aluminum shipping container... More Info
Shipping Container Lumber Dry Kilns by Global Energy Global Energy designed and developed the container kiln back in 1991. The purpose is to give access to portable sawmill owners, furniture makers, and small business the value added profit of dry kiln lumber and quality hardwoods... More Info
Vacuum Kiln Conversion Kit for Lumber and Wood Dry Kilns Convert your existing conventional dry kiln into a fast drying vacuum kiln. Similar to vacuum bagging in the boat building and aircraft industry, we have come up with a proprietary process which allows you to build a very simple vacuum kiln at a fraction of the price, and without the intensive conventional metal chamber structure... More Info
Vacuum Pump Cart System for Bagging Clamping Wood Drying and more Vacuum Cart with 2HP Pump and Dual Pistons with multiple multiplex vacuum ports and liquid reservoir... More Info
Vacuum Bagging Basics Vacuum bagging is a method of clamping, which has traditionally been used in the composites industry, but can also be used for vacuum drying materials, including wood products... More Info
| CONTACT TEL: 608-238-6001 Email: greg@globalmicroturbine.com | RSS | AMP |